A brilliant set of tips on story writing from Emma Coats, a former story artist at Pixar. The tips are great for anyone who writes or tells stories at all, and #14 especially applies to how I feel about my own work as a writer:
#14: Why must you tell THIS story? What’s the belief burning within you that your story feeds off of? That’s the heart of it.
So good. If you can't live without writing or telling what you are, then don't do it.
Google's hit an odd new trend. After years of giving us new free services, one after the other, it's now releasing $1,500 glasses and $1,300 laptops that can only run a browser. And it's taking away some of the free services we've grown dependent on.
Like Google Reader. The free RSS service from Google practically pushed every other RSS sync app out of the market, and while it may have not been the most advanced RSS reading app, it became the de facto RSS app and sync engine. Most native RSS readers, like my favorite, Reeder, relied on Google Reader's backend to keep up with RSS subscriptions. It just worked, and was free, so it became the standard. Why make an RSS reader app when Google has a free one that everyone already uses?
Then last week, Google decided that Reader wasn't that important, and announced it was going away in July. Suddenly, the market for RSS readers is wide-open again, and most of us have had to quickly decide on alternatives. I wrote up tutorial for getting your data out of Google Reader, and rounded up some of the best alternate RSS reader apps online today for Web.AppStorm; be sure to check that article out if you haven't read it already.
For me, though, there was only one RSS reader app I wanted to switch to: Fever. Shaun Inman's self-hosted RSS reader had caught my eyes years back, and I'd always meant to try it out … but Google Reader was so simple to just stick with that I'd never given it the effort. Now, I had no excuse not to try it.
The Fever
Fever is to Google Reader what WordPress.org is to WordPress.com: a self-hosted app that does much of the same thing as the free, online version. It's an app you'll download and run on your own server (or shared hosting account), and then will need to maintain on your own, just like programs you install on your computer. Google Reader gave us a simple service we could all use online, just like WordPress.com lets people make blogs online for free. But with Google Reader getting shut down, Fever becomes an even more attractive option, one that you might be interested in moving to even if you didn't feel yourself itching for more control over your feed reader (the biggest reason you'd want, say, to upgrade from a WordPress.com blog to self-hosted WordPress.org).
Oh, and Fever gives you more than Google Reader did, too. In addition to letting you read each of your RSS feeds in the order they've been updated — and yes, share them with your networks or save them to Instapaper if you want — it also gives you a list of the top news articles detected automatically from your feeds. It's like your own Techmeme or Google News, built from the sites you actually care about. But we'll talk about that more later.
Sparking the Fire
The only thing is, installing an app on your own server is usually a tad tricker than just installing Microsoft Office on your computer. WordPress has a so-called "famous 5 minute install", but is actually fairly complex to get setup if you've never hosted your own site before.
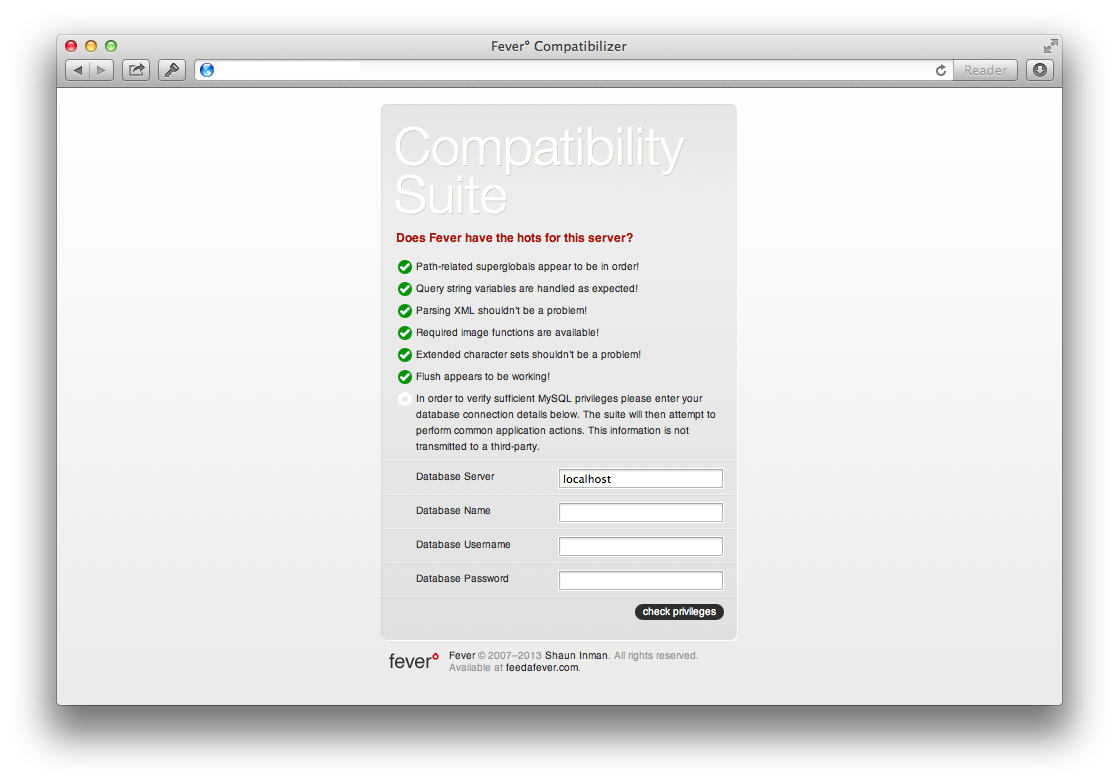
Fever, though, isn't tricky at all to get setup. You'll just download the Fever Server Compatibility Suite, which contains just 3 files, then upload them to your server via FTP. This should be simple enough to do if you've ever self-hosted your own site. Then, you'll visit the boot.php file on your site that you just uploaded, add info for a new MySQL database (again, something that you should find simple if you've ever hosted your own site), and purchase a copy of Fever via PayPal (yes, it costs $30. If you use it for 2.5 years, that's less than $1/month).
You'll then need to add your activation key to your own Fever install, and create an account to login and check your feeds. And with that, you're done. Really, no more files to upload or anything else. It's really, really simple to setup, so much so that I was surprised.
Fanning the Flames
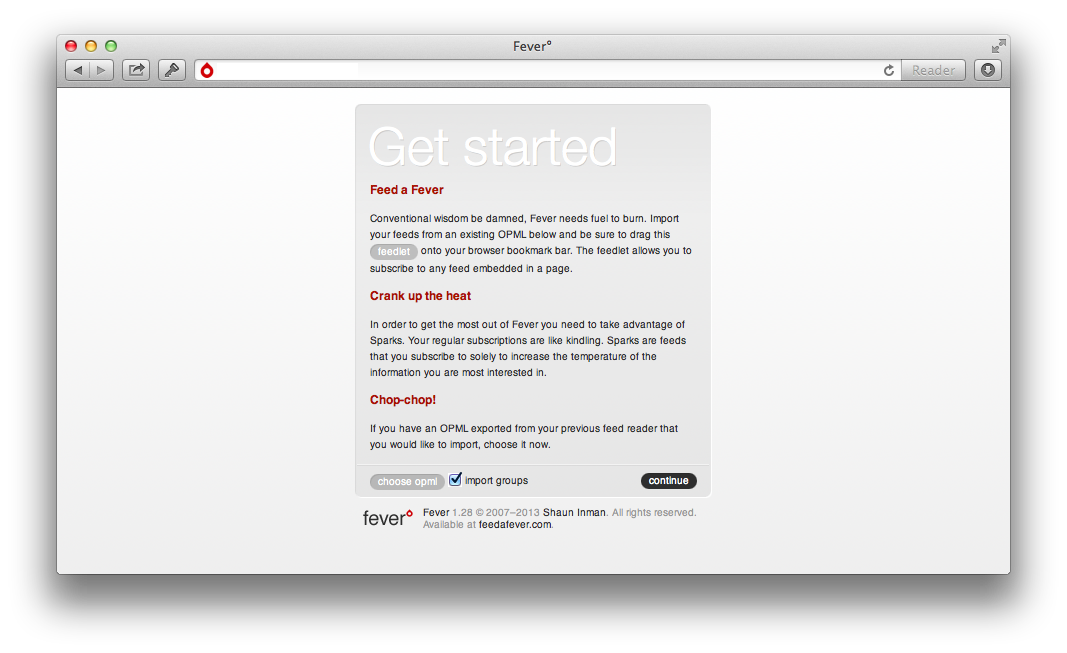
Once you've got a Fever account setup on your own Fever install, you'll never have to worry again about losing your RSS feeds. Now, all you need to do is subscribe to your favorite sites. Fever makes this easy, giving you a bookmarklet to quickly subscribe to sites you visit with a simple click (or keyboard shortcut — Safari lets you press CMD+number for the bookmarklet you want, which is how I use them by default). Or, you can import your OPML file from Google Reader, following the directions on my Web.AppStorm post, or import feeds from any other RSS app you use.
And with that, you're done. Fever will check each of your RSS feeds, which might take a minute or so, depending on how many feeds you have and how fast your server is. After that, though, you can read through your RSS feeds in newest or oldest first (choose your preference in settings), and can jump through them quickly using familiar Google Reader-style keyboard shortcuts. You can even share articles or save them to Instapaper using the built-in sharing options, which also lets you add your own services for sharing if you'd like to. There's also a built-in saved articles option, which lets you mark articles as favorite so they'll be kept forever, and a search tool to help you find older articles (and you can set how long you want old feed entries kept — a nice option if you want to save space and keep less, or if you want to built an exhaustive RSS feed history and could care less about space). That's everything you could want if you're wanting a service to replace Google Reader.
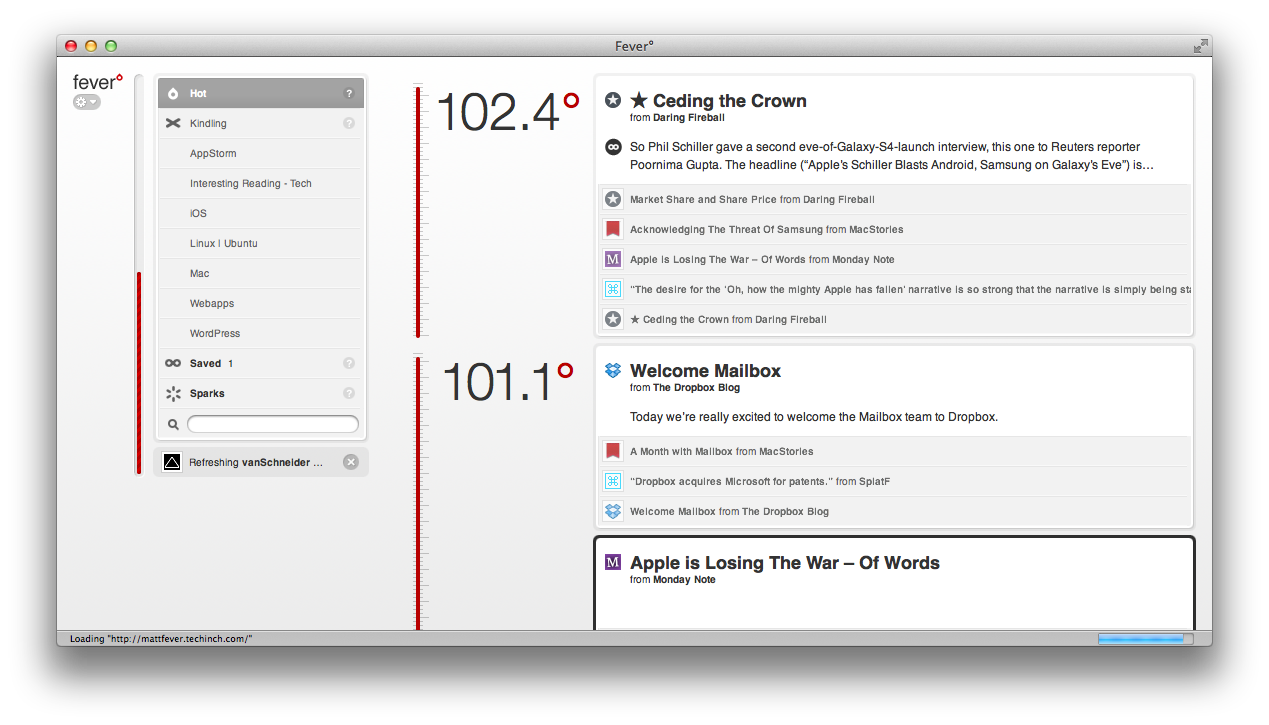
Then, though, there's the Hot feature that makes Fever Fever. It goes through all of your feeds and finds the most popular links, then surfaces them for you with temperatures to show how "hot" they are. You can even add new RSS feeds to your "Sparks" section to add more data points for finding hot articles; these RSS feeds won't show up in your unread list, since they're likely sites that publish way too much to keep up with everything they say (think CNN or Techcrunch), but they'll help Fever find the hottest things you need to know. So now, you've got your own customized Google News replacement along with your own, self-hosted Google Reader.
Keep the Fire Going
Fever doesn't have native apps of its own, but there's plenty of ways to run it anywhere you want since it's a web app. You can, of course, just visit it in the browser anytime, and it even has a mobile version (sadly, though, one that's not retina display optimized) built-in for reading on the go. On your Mac, you can also use Fever in Fluid for a more native feel, with an unread count on your Dock. In Windows, you could do the same — to a degree — by saving the webpage as an app in Chrome.
Then, on the iPhone, my favorite Google Reader app — Reeder — also works with Fever (and I hope the Mac version gets Fever support sometime soon). You'll just need to login with your account, and you'll get the same experience you're used to if you already used Reeder, with the addition of the Hot section. There's also another iPhone app, Sunstroke, that's gotten praise from others I know. If you're using Android, there's the free app Meltdown that syncs with Fever, and you can get it from the Play Store or Amazon.
Oh, and on your server? There's not much you'll need to do. There's the option to check for and install updates to Fever built-in to the preferences menu, and pretty much everything else should just work. At least it has for me so far.
Goodbye, Reader!
With that, I've fully switched away from Google Reader. I only wish I'd done it sooner. It's nice to run your own services, and when they end up as easy to use as Fever did, you only feel dumb for not switching sooner.
Whether you switch to Fever or something else, be sure to hurry and do it. You've only got until July 1st. Also, don't forget to subscribe to our Techinch RSS feed to keep up with everything published here!
…how to move paragraphs and outline entries with a simple keyboard shortcut.
Keyboard shortcuts are awesome, but only if you know them. The text editing keyboard shortcuts in OS X are one of the best things about it, and formatting shortcuts in Word saved me hours of trying to find the center text option over the years. But what's frustrating is when there's an option to do something that you would have love to have found sooner, only to discover that it'd been there all along years later.
I've been using Microsoft Word for well over a decade, going from typing up essays in high school in Office '97 (which was, admittedly, old at the time) to using Office 2007 and then 2010 in college daily. One of the things I used to fuss about the most was writing outlines in Word. OneNote made it simpler, as did moving to the Mac since Word for Mac has an outlining mode, and in both of those you can drag-and-drop outline entries into the place you want. But in Word, it was a frustration all that time.
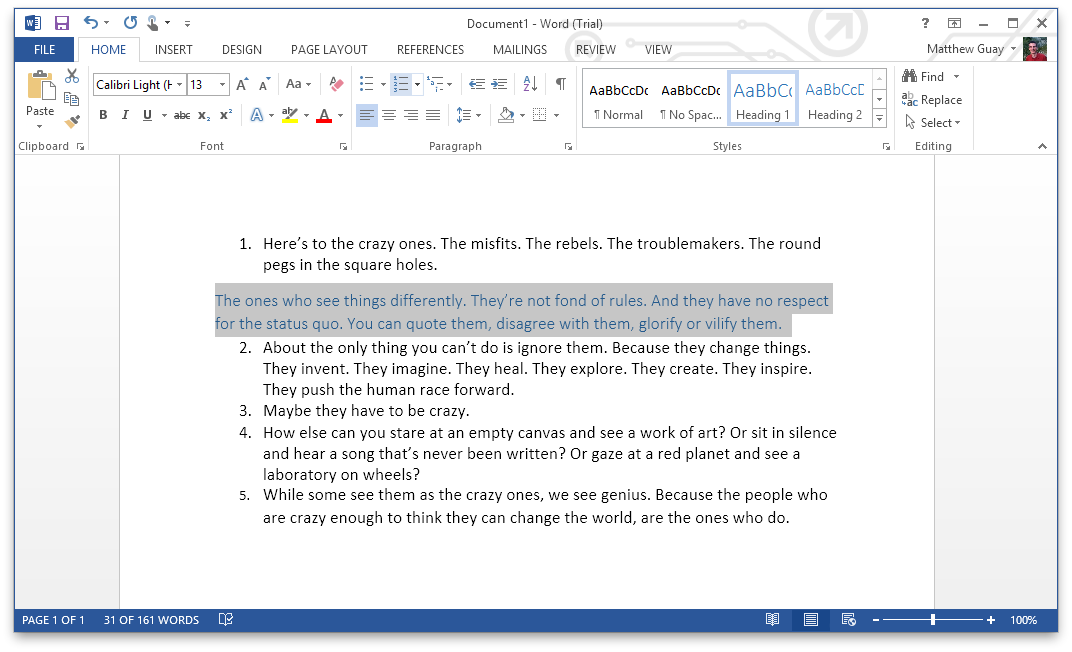
This week, I found that there's a very, very simple way to move a paragraph — or outline entry — around in Word: just press alt+shift+up/down, and the line will move up or down. Press the left or right arrows while holding down alt+shift when editing an outline, and you can move an entry deeper into or further out of an outline's levels. I discovered it while trying out Word 2013, and thought it was a great new feature. Nope. It's been in there for quite some time. I found it works in Word 2007, 2010, and 2013 for Windows, and Word 2011 for Mac, and likely works in older versions, though I don't have any around these days to try out. It sadly doesn't work in the Word Web App, though.
It's simple, works very nicely, and is something I'd be sure to use often if I used Word more these days. If you happen to use Byword for Mac, there's a similar feature in it, using ctrl+cmd+up/down. And, there's a geekier move text option in Vim. Otherwise, you'll have to stick to cutting-and-pasting paragraphs and outline entries to the place you want.
Or, you know, fire up Word and move text around with alt+shift+up/down. Now if only Word handled plain text and HTML nicely… (hey, one can wish).
Note for Mac Users: Mission Control uses the ctrl+shift+up/down shortcuts in Lion/Mountain Lion, so you'll need to change those first before you'll be able to move text with this trick in Word for Mac.
Avatars — those little photo icons on every social network and comment form these days — can be rather difficult to pick out. You need a decent shot of yourself, one that's recognizable even when it's just a tiny thumbnail, but one that still conveys your personality. Not fun.
So why not get your picture turned into a cartoonish avatar? That's exactly what Jaume Estruch, a freelance designer I've met through App.net, is now offering for 5€. Just send him a picture of yourself — even one you've shot on your phone's front-facing camera — and he'll turn it into a custom drawn avatar. Here's some examples of his original work from App.net accounts, including my own demo avatar he drew for me.
You'll just send off your picture, including any color requests or extra things you want included (say, a hat), and within 7 days you'll get a 500x500png photo to use online as you like. It's a neat idea for a graphics design service, and since he drew my avatar for free as one of his original demos, I wanted to spread the word about his service.
In early January, I heard of a new startup - TypeEngine - on App.net, one that piqued my interest immediately. Daniel Genser and Jamie Smyth have set out to make a high quality system to let writers and publishers launch their own iOS Newsstand apps, without touching a line of code. As a writer and editor, I've found Newsstand to be an exciting potential for a new way to publish, but the need to make a full iOS app has made it far more challenging to consider actually making a Newsstand app. But, TypeEngine is setting out to level the playing field, so anyone could make their own Newsstand magazine as long as they can do the hard work of lining up quality content for their app.
TypeEngine is aiming to offer a platform to make simple, text-focused magazines, in a design similar to my theme here on Techinch.com as well as many newer blogs today. But then, it's also similar to Marco Arment's The Magazine, a new iOS Newsstand (and now web-based) magazine that's been the inspiration for many of us to try to make digital magazines. The Magazine is quite the awesome project, and I've been a subscriber for months and had planned to write about it this week since it launched web-based subscriptions. Marco and his team have done a great job putting together amazing content in a great app, and deserve the success they've achieved so far.
What's frustrating, though, is that TypeEngine is already getting criticism that its initial designs are too similar to The Magazine, enough that TypeEngine addressed them today in a newsletter. Marco then followed up on his blog with a mildly critical stance on TypeEngine.
But here's the thing: magazines aren't a new idea, just like newspapers aren't a new idea. Neither are blogs; they've been online for well over a decade now. Clean, single column designs with light backgrounds and sans serif fonts aren't unique either; they've been used in print in the past, are terribly popular on writing-focused blogs today, and are now being used in new iOS magazines, including The Magazine, upcoming magazines from TypeEngine, and undoubtedly many others. Even if we all blogged with the very same theme, it wouldn't mean we were all copying each other; after all, almost every newspaper worldwide looks very, very similar at first glance.
What must - and will - be unique is the content. TypeEngine is setting out to do for iOS publishing what WordPress did for web publishing. WordPress democratized publishing, making blogging accessible to anyone, no matter what their coding skills. You can fuss over it all you want, but it's a powerful piece of software that now powers sites from the smallest startup blog to Time Magazine's blogs. But that didn't take away anything from the early hand-coded blogs, and original bloggers such as Dave Winer have kept on blogging, even though the rest of us now can so easily star our own sites with WordPress or other blog engines without digging deep into code.
If TypeEngine does for mobile publishing what WordPress did - and is still doing - for web publishing, then that will be a huge success for everyone. I look forward to continuing subscribing to The Magazine and hopefully subscribing to more new magazines on different topics that can be launched, now that writers can focus on writing and still publish easily on Newsstand.
I find TypeEngine exciting in the same way I find blogging engines exciting, and as a writer, launching a magazine is an exciting new potential. That's why I got in touch almost immediately with TypeEngine about the potential of launching a magazine with them. Last month, Techinch was picked as one of TypeEngine's launch partners, and I'm currently planning on launching a digital magazine this year. So I'm not just a unaffiliated bystander, but then, neither is Marco.
I highly respect Marco's work on Instapaper and The Magazine, and that inspires me in my own work. But I don't feel like I'm ripping his work off by launching a magazine with a text-focused design with TypeEngine, any more than The Magazine is ripping off the Facebook iOS app which popularized left-to-right slide-out menus that The Magazine and countless other apps now use. Perhaps everything is a remix far more than we all want, but that doesn't mean we can't all be unique in our own work even while we get inspired by the work of others. That's what the Magazine's design is, and that's what most other app designs are, and yes, even my TypeEngine magazine will be inspired in some ways by The Magazine and other publishing efforts, including early 1700's newspapers.
Woe betides if I or anyone else copies the content in any other publication, or the precise design of another app or site. But no one has a monopoly on a clean, text focused design in an iOS app, any more than anyone has a monopoly on similar designs on the web.
I take an insane amount of screenshots from my work as a tech writer, and am so used to documenting almost everything with screenshots, I'll typically take screenshots of new apps when I install them even if I'm not planning on writing a review. I took the time to capture the CS6 splash screens just for fun. It's a tiny obsession of mine, one that - aside from writing reviews - I've never really done anything with.
A post on John Gruber's Daring Fireball today reminded me of the joys of Folklore.org's index of tales of the early days of Apple. I've read every article on the site years ago, but the article Gruber mentioned today - about how Mac OS Classic's calculator UI came to be - got me searching for more screenshots of the Mac Classic calculator, just to compare the image.
That led me to an amazing site, GUIdebook.org, which features very nice screenshot collections of UIs ranging from Mac OS System 1 through OS X Panther, Amiga OS Workbench 1.0, OPENSTEP, the original Symbian OS, and more. It also has a number of rather old articles about early operating systems, as well as classic tech ads, interviews, icons, and more. It's the most comprehensive UI - and OS history - site you can imagine, and it's nicely designed. The only sad thing is that the site hasn't been updated since 2006, apparently as the site's author started working as an user experience designer at Google around that time.
Screenshots of new apps today might not seem like anything important, but 20 years from now, someone will be looking back at screenshots of OS X Mountain Lion and Windows 8 with the same nostalgia and curiosity that we look at Mac 1 and Amiga screnshots. It makes me want to start preserving more screenshots from the latest stuff today … yet another project I'd like to take on sometime.
So, if you want to waste some time this weekend on tech nostalgia - or want to see what UIs looked like before your time - here's some great resources. Know of any more?
Folklore.org - tales of Apple's early days, along with some stories about Microsoft and more
GUIdebook.org - A detailed site filled with screenshots, splash screens, icons, sounds, ads, and more from older OSes and apps.
TostyTech GUIs - A similar site (with a more '90's looking site design) that has screenshots of everything from the Xerox Alto to OS/2 to Windows 8. Not as intricately organized as GUIdebook, but still an awesome resource for old screenshots.
I just got my Nifty MiniDrive (a microSD adaptor that fits perfectly in the MacBook's SD card reader) this week, after backing it on Kickstarter last July, around the same time I bought my MacBook Air. It was a long wait, but one that was rather interesting as the Nifty team kept all of us Kickstarter backers informed about every step of the production process.
Plus, it works great in my MacBook. I'm a tad sad I didn't end up getting one of their other colors, but hey, the silver one does look very inconspicuous. Also, can't wait until 128Gb microSD cards are released, but for now, the ~$30 32Gb microSD card I picked up yesterday is working great.
Yesterday I wrote a rather scathing review of Adobe’s new Photoshop Touch for iPhone. It was deserved, I still feel, due to the app’s near-inability to work with other apps, even Adobe’s own desktop apps.
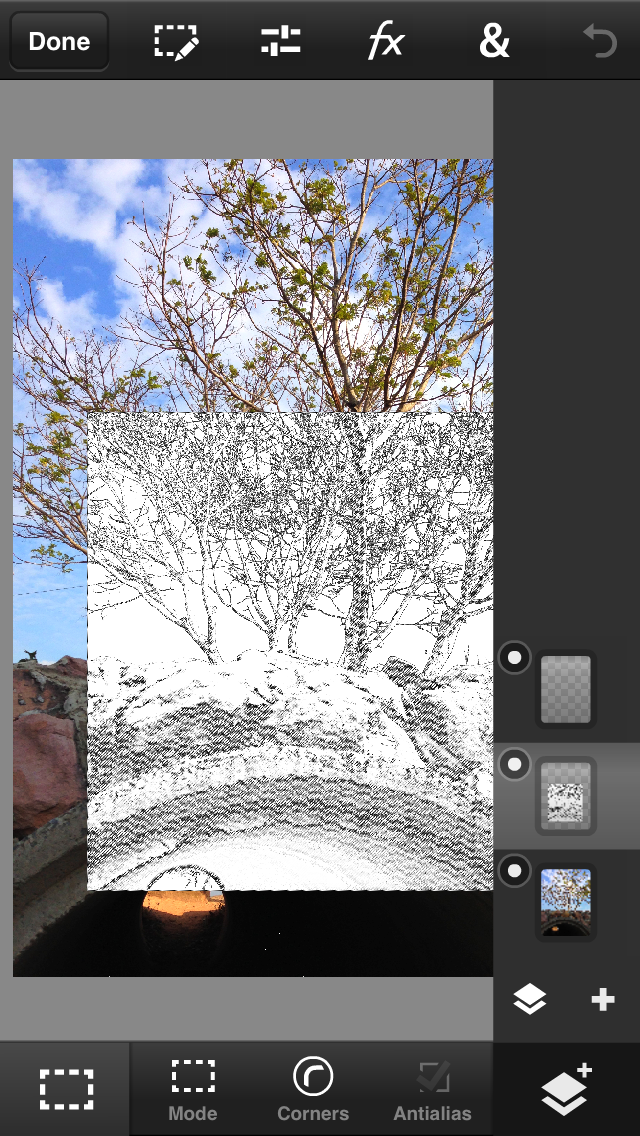
Then today, I wanted to do turn a picture of a friend’s daughter into a graduation gift. I’d take the picture on my iPhone, so I imported it into Photoshop Touch, did a bit of brightness and curves adjustment. Then I added some text - and it turns out Photoshop Touch had far more fonts when you're on a decently fast internet connection (29 to be precise, versus 10 when you're offline or on an EDGE connection).
I picked the font color from the picture, added a faint glow, then cropped the picture to the size I needed. Minutes later, I printed it off my printer over AirPrint. It worked, and was a great tool for the purpose.
So, if you want to edit photos on your iPhone, Photoshop Touch at least a decent option, one that let's you fine-tweak individual settings - like glow and shadow effects - far more than in other apps I've used before. It's just complex enough that, yes, it feels a bit too complex for a phone. But then, so does iWork on the iPhone.
I'm far from an artist, but I love trying out new apps. I also own Creative Suite 6 Design Standard, and use Photoshop daily. So, when Adobe announced that Photoshop Touch for iPhone had finally been released, after being available on the iPad and Android tablets for quite some time, I was excited to go download it.
Sadly, it was far, far less than I expected.
It's All About Integration…
One of the many things I use Photoshop for in my daily work is making the featured image icons for posts on AppStorm. For some of them, we have a template .psd file that we'll drop a .png icon into, tweak it a bit, and export as a 200x200px .png file. I thought I'd try doing this directly from my iPhone.
I opened Dropbox, found the .psd file, and figured I'd just open it in Photoshop Touch. Nope. It didn't show up in the Open In menu. So I tried emailing it to myself (yup, old school style). Still no luck. There is no way to just get a .psd file - or even a normal picture file - into Photoshop Touch from any other app.
Your only options are to import photos from your iPhone Photos Roll - an obvious option for starting a new edit - or from Adobe's Creative Cloud. You can signup for a free account and upload up to 2Gb of images, which is what I did since I bought Creative Suite 6 traditionally and don't have a Creative Cloud subscription. So, finally, I uploaded my .psd file to Creative Cloud from my Mac, then downloaded it to Photoshop Touch on my iPhone. Voilà.
And guess what: that too failed to accomplish what I'd set out to do. Why? Because Photoshop Touch imported my layered .psd file as a standard image, with no layers, layer styles, editable text, or anything. I might as well have imported a .jpg picture.
Working backwards - making a layered .psd on the iPhone and sending it to the Mac - only works marginally better. You'll be able to email files to yourself, but sending them to another app didn't work at all in my tests. Also, make sure you don't email yourself .psdx files, since Photoshop on the Desktop can't open them. You can upload to Creative Cloud, though oddly, .psdx is the only format offered. You can convert it from the site, though, before downloading to your computer. And it could just be my internet connection, but I seldom could get emailing or uploading to Creative Cloud to work.
Using Photoshop Touch on its Own
I've painted a pretty bleak picture of Photoshop Touch so far, but it's marginally better if you want to use it on its own. If you're wanting a mid-level way to edit your photos - something beyond the built-in photo editing and the likes of Instagram - then it's at least a decent option, if you're aware of what you're getting into when you start. It's not Photoshop, but rather an app that shares its name.
There are nice things: you'll find a quite good cropping and selection tool that works as you'd expect, with options to set your own image size in pixels and lock aspect ratios. You can add text - though only with an odd set of fonts that's mostly cheesy but does include Myriad Pro. You can paint - but with only one brush, though at least you can set the size, hardness, flow, and opacity. Oh, and picking colors is an exercise in imprecise frustration, and you won't find any options to choose colors by their hex number or from a Pantone palette.
There's a few features you'll almost be surprised to find, after all of the other limitations, including a magic wand that actually works good, along with the clone stamp and healing brush. There's also the smudge and blur tool, as well as the lasso selection tool. And, there's layers, so you can select a section, copy it to a new layer, add an effect, set the blending mode and opacity, something you'd expect from real Photoshop.
You'll find color curves, levels, brightness tools and more, along with a handful of classic and Instagram-style filters. There is an adjustable Gaussian and directional blur, as well as drop shadow, glow, and bevel effects. Everything's adjustable, something you don't always find in mobile apps. You can select a section, and apply the filter - say a blur - just to it, which is nice, say, for removing private stuff from screenshots, something I do often.
But really, that's just about it. It's quite a bit of photo editing features, some that are even nice, but it's not what I would have expected from Photoshop. No nice tutorials or tools to import online images as the iPad version has, either; this version is really stripped down. It oddly feels like a Windows app on an iPhone, and you'll wish you could trim down your fingers to use it better. Your best bet will be to save your finished pictures as .jpg files to your Camera Roll, too, since Photoshop Touch's sharing options are frustrating at best, and broken at worst.
One other thing to note: Photoshop Touch imports photos at 3 megapixel by default, but you can adjust that in the settings. That said, editing 8 megapixel photos natively in Photoshop Touch requires patience, as every edit brings up the wait icon, something you'll get used to seeing in Photoshop Touch.
In Closing
I wanted to love Photoshop Touch for iPhone, but it really comes up lacking. And that's sad.
The first version of Photoshop I used was Photoshop Elements 7 on the PC, and it had enough of Photoshop's power to make me decide to get the real deal while I still had a student discount. That's why I originally bought CS5: Elements, the basic version of Photoshop, showed me how much I could do with it. It was stripped down, but still powerful.
If Photoshop Touch was the first version of Photoshop I'd ever used, though, I'd be looking for alternatives for editing photos on my Mac. And that's really bad news for Adobe, since far more young computer users today will get their start on touch devices. While other companies are putting their best work into their iOS apps, Adobe's treating them as an afterthought.
Photoshop Touch is a $4.99 app for your iPhone, which isn't bad, but not something I can really recommend. If you need something to edit pictures, and can live with its limitations, then it can be usable, but don't have your hopes too high. I'll keep it around and see if updates make it shine better, but for now, it's far from an exceptional iPhone experience.
It's easier than ever to get published. As Seth Godin would say, you just need to choose yourself - just decide you want to be a published writer, and boom you can be published.
It really is that simple these days. It doesn't take anything fancy to start a blog, and it really doesn't take much to get a least a bit of traction.
I personally started blogging years back as a project in college, with a humble WordPress.com blog. I then added a domain to said blog, moved the blog to WordPress running on my own hosting account, moved to another web host, then another, then moved my site to Kirby CMS, and finally on to my current web host. In the mean time, my blog was the catalyst behind every job I've gotten so far, and has earned a decent chunk of change - nothing to supplement my real job, but enough for a couple nights out a month, and server costs.
Here's what you need:
A domain name
The very first thing you should get is a domain name. Any domain name, really, but ideally something you can live with for years, decades even. Your domain name is the only online identity you really own, and if you start blogging with your own domain name, you can move your site to any other service and your old links and followers will still be able to keep up with your site. No matter where you're going to start a blog, getting a domain name should be the first order of business.
Domains aren't free, but at $10/year on average, they're not very expensive either. I'd recommend registering your domain at a different company than where you're hosting your site, so your domain can never be locked up in a dispute over your hosting, or vise versa.
There's a number of places to get a domain name. I'm currently using Namecheap, though Gandi is another place that I've often seen recommended. I also have domains with Dreamhost, and have bought a domain with Media Temple before; both can be fine options, but I'd again recommended using a different place to register your domain than you're using to host your site.
Also, I'd recommend getting a .com domain name. There's no reason you have to get a .com, but I'd still highly recommend it, since most people will assume it's a .com by default. It just makes things easier.
One more thing: never get rid of that domain if you've got any bit of traffic coming to it. If you want to switch to a new domain, point the old domain at the new site, but don't just throw it away.
Social Media
Now run, don't walk, and get at least a Facebook Page and Twitter account for your site. An App.net account - especially now that they have a free tier - might be a good idea too, as would a YouTube or Vimeo profile. But at the very least, get a Facebook Page and Twitter account. Try your hardest to get the same name as your domain, but if you must, settle for something different. Just make sure to get the very same name on both accounts, even if it's not the same as your domain.
A Place For Your Blog
Wait: give yourself a round of applause. You've gotten halfway there already. Because now, no matter where you put your blog, and no matter what you change in the future, you can always get your site followers pointed to your current site.
You're now ready to start your blog. There's a number of options of how you could do this, and here's the services I'd recommend:
Hosted Services
The simplest way is to just use one of the ready-made blog solutions online. They're free, work great, and you can always move on to something else if you need to, now that you have your own domain. You won't be able to change as much, but you won't have to deal with hosting, either, which is a major bonus. Here's the services I'd recommend:
WordPress.com - This is where I first started my site, and it'd still - for most purposes - be the place I'd recommend. You'll need to pay to bring your own domain, and you'll need to pay to tweak your site's theme beyond the basics, but otherwise, you'll have 99% of the power of WordPress without messing around with hosting. You can make a site with static pages, or just make a blog, and then can export your site to transfer your site to WordPress on your own server if you ever want to. WordPress powers many of the biggest blogs online, and it's the everything-plus-the-kitchen-sink option. And at least it's rather simple on WordPress.com.
Tumblr - Just want a blog, perhaps one where you quote and link to articles on other sites, share photos, and update regularly? Then Tumblr's a really great option. It's got less power than WordPress.com, but it's dead-simple to use, doesn't have ads, and has a rather awesome community. Bringing your own domain is free, and you can export your data easily, too. Plus, you can tweak your themes far more than you can in WordPress.com.
Skrivr - Want to try a new way to blog, something similar to Kirby like I'm using to power Techinch? A system where you can just write plain text files with Markdown formatting, sync via Dropbox, and publish without ever opening a browser window? Then Skrivr is the new blogging option you should try if you don't want to host your own site. It's simple, designed for writers, and the service I'd try if I was starting a new, free hosted blog today.
Squarespace - When you want to go pro, and don't mind spending a bit to do so, then Squarespace is the hosted service you should check into. You'll get some of the best site themes - and best visual site editor - on the market, great iOS apps, a solid service that even includes eCommerce support, and even lets you post from Dropbox. It's the only service I really considered moving Techinch to when hosting got to be too much of a pain.
Self-hosting Your Site
So you've outgrown Tumblr and WordPress.com, and want something more. That's the normal progression most bloggers make - myself included - and now you'll need to find the place to put your site and what to use to run it. But first, putting it online.
There's a few options out there.
Shared Hosting - You'll likely think of shared hosting first, but really, most shared hosts are awful. Sorry, but it's true. I've had terrible experiences with several, and even DreamHost went bad on me after a while. Media Temple's (gs) shared hosting has quite the bad reputation, despite MT's great reputation for their other hosting services.
There's two I think I can really recommend right now: NearlyFreeSpeech, which charges per gigabyte of storage and bandwidth you use, and A Small Orange, which has reasonably priced tiered hosting. A Small Orange is the hosting service Techinch is on right now, and it's working great so far. They told me via chat that they allow up to 512Mb of ram per shared hosting account, a limit no other shared host I've ever seen would share. I'd never trust a shared host that offers "unlimited" hosting, because they all have a limit. Somewhere.
VPS and Beyond - Shared hosting is nice because almost everything is setup for you, but the next step up - a VPS - is a great option that'll take a bit more work from you. You'll need to setup and maintain a Linux server, or get a managed VPS which is more expensive. Media Temple gets good ratings on their managed VPS, and VPS.net is a popular option for unmanaged and cheap VPS. Yet another option is a new app engine like Amazon EC2, Pagoda Box, Fortrabbit, or Heroku. They're very cool, but again, they'll take a bit more geekiness on your part.
The Software
Then, once you've got hosting, you'll need the software to run your site. There's more options that I could ever list, but the two solutions I'd recommend now are Kirby, the awesome plain-text CMS that I'm using on Techinch (see my full review for more info) and WordPress.org. If you go with WordPress, I recommend the Twenty whatever themes that come with WordPress, or anything from WooThemes.
You'll want a few other things: analytics to keep up with your site traffic, an email newsletter, perhaps, and ways to make money. For analytics, Google Analytics is still your best bet for a simple, powerful, and free analytics solution. Mint is awesome if you're hosting your site yourself and want to run your own analytics system. Then, MailChimp and its smaller and simpler cousin TinyLetter are both great for email newsletters. No reason to run your own email newsletter system unless you really want to.
You should also setup IFTTT to automatically publish everything you post to Twitter, Facebook, and any other social networks you use with your site. That way, your followers on those networks will keep up with what you write easily, without you having to remember to post to all of your sites.
You also might want your own customized email address for your shiny new domain name. Google Apps for domains isn't free anymore, for the most part, but you can still get 1 free email address on your own domain with it via Google App Engine. Here's a tutorial on how to do that.
Making Money
If you read this far, you surely want to get something out of blogging. Now, I never thought I'd make money - much less, a living - from blogging when I first started a WordPress.com blog, but my entire career has been shaped by blogging - and WordPress, incidentally - ever since.
The thing is, your blog can be successful, even financially, without actually making any money directly. It gives you a voice on the internet, lets people know about you and your work, and is about the best resumé you could ask for. Communications are always important, and if you can write well, you can express your thoughts about anything. That's a very important skill to show off.
Then, as you get a following, you have the chance to turn that attention into a business. You can write a book, or build an app, or record an album, and instantly have an audience for it, both on your site and your site's social network accounts. You can start a store on your blog, selling almost anything, and make some extra cash. You could start a paid email newsletter - yes, MailChimp supports that - or start a magazine app that's paid, and if you have people that love your writing, you'll get subscribers and make at least some money. You could even put a paywall on your site, and charge for some of your content, if you're successful. There's tons of opportunities, things that are making other people's incomes or at least some spare change.
But that's not all. Ads and affiliate links are another great way to make money, even while you're getting started. Ads are a tough nut to crack, though; they're based on pageviews, so you'll have to be successful at getting a lot of readers to make much there. Adsense can make your site rather ugly, and it really doesn't pay out that much if you don't have many visitors - and will only send you payments if you get over $100 in ad revenue. Not recommended, and yes, I've tried Adsense.
What I can recommend is trying to get into one of the newer, design-focused ad networks like Yoggrt, Fusion, or InfluAds, the ad network Techinch is a part of right now. You'll have to have a decent number of pageviews on your blog before you'll be able to be considered, but if you can get in, it's worth the wait. The ads look classy, are for stuff your readers might actually be interested in, and their payout if not huge is at least more consistent than Adsense.
But what makes even better money is affiliate links (just be sure to disclose that you're using them). Amazon famously has an affiliate program, as does Apple iTunes/App Store. Most companies have affiliate programs, which will give you, say, 5%+ from each sale made after someone clicked on the link in your article. Find an indie book or product that has an affiliate program, and it'll likely work even better for you. I'd recommend writing about stuff you'd write about anyhow, but if something does have an affiliate link and you'd write about it anyhow, then use it and disclose the use. You'll likely find yourself making money that way, if only enough to keep your server fees and domain name covered.
The most important thing, though, is trust. Don't sell yourself or your site out, and don't make your site a scammy mess of ads. It's just not worth it. Do your best work, without even thinking about how to make money from it, and it'll lead to more opportunities on its own. Really.
Write, and write, and write, and…
Now here's where I've gone wrong so much: you need to write often, at least every week if not every day. I'm bad at this, since my day job is editing Mac and Web AppStorm, and sometimes there's only so much you can write in a day. But the best way is to be consistent and write, even if only a little.
And have fun! Running a site is an adventure, and you'll keep learning from it. I sure have.