How to Quickly Design a Beautiful New Site with Webydo
You need a website for your business. There’s no question there. What’s tough to figure out is how you’ll create a website if you’re not already a web developer and have no experience coding. There’s pre-made themes and a number of services to build a site, but most still require CSS and HTML skills to make the site look exactly like you want—and they’re mostly centered around building a blog anyhow.
If all you want is to design a beautiful new site without having to touch code, Webydo is the app for you. It’s an online web design studio that lets you design a real site as easily as you could design a template graphic in Photoshop. In just a few minutes, you can have the site you’ve dreamed of, without needing to know anything about HTML or CSS.
Here’s how you can design your own site in Webydo in minutes.
***
This tutorial is sponsored by Webydo
***
A Blank Canvas, or a Premade Theme
Webydo’s online design studio lets you drag and drop the elements you want onto a grid, type in the content and add the media you want, and then turns that into a full-featured website ready to publish in a click. If you’re making your own site, you can tweak it until everything looks the way you’ve always imagined, and publish your site all from one place. If you’re a designer, you can use Webydo to build sites for your clients, then let them add their own content and handle the billing without messing up the design. Best of all, you can experiment with Webydo to your heart’s content for free, and only pay when you take your site live with a custom domain.
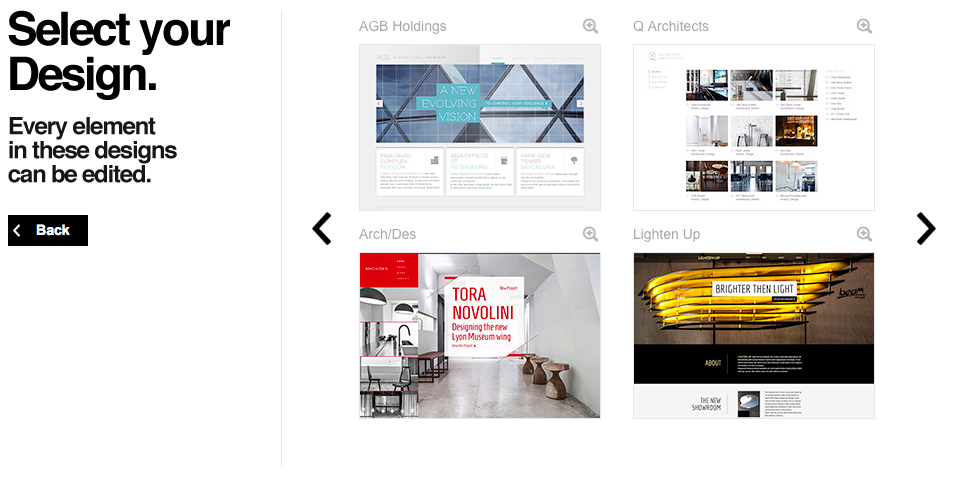
Here’s how it works. After signing up for a free Webydo account, you’ll be asked to pick if you want to make a new site from pre-made design, a layout that already has a standard structure for your site, or with a blank canvas where you can make anything you’ve imagined. The Design option is the best if you want to quickly make a beautiful site without having to do everything by hand. You can pick one of two dozen pre-made themes, then can tweak every part of the design once it’s open in Webydo. And if you happen to not like the design you selected, you can start over with a new site and pick another one of the designs.
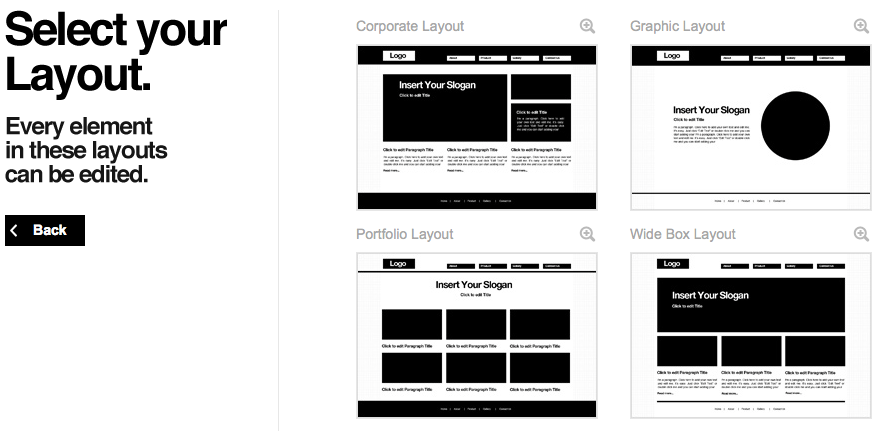
Otherwise, the next best option is to pick one of the pre-made Layouts. These will include a basic menu, image and text sections, headings and more that’ll help you start off your site quicker. You can then move around the sections and resize them you want, then quickly customize them to make the site you want. Or, if you’re really sure you want to design your own site from scratch, you can pick the Blank canvas option for a clean slate where you can add all of your site elements on your own.
Now you’ve got a base to work with: either a theme to tweak, a framework to work around, or a clean slate ready for your ideas. Your site’s in the center of the screen, with layers and elements listed on the left and a Microsoft Office ribbon-like toolbar on the top. It’s time to get to work getting your site looking the way you want.
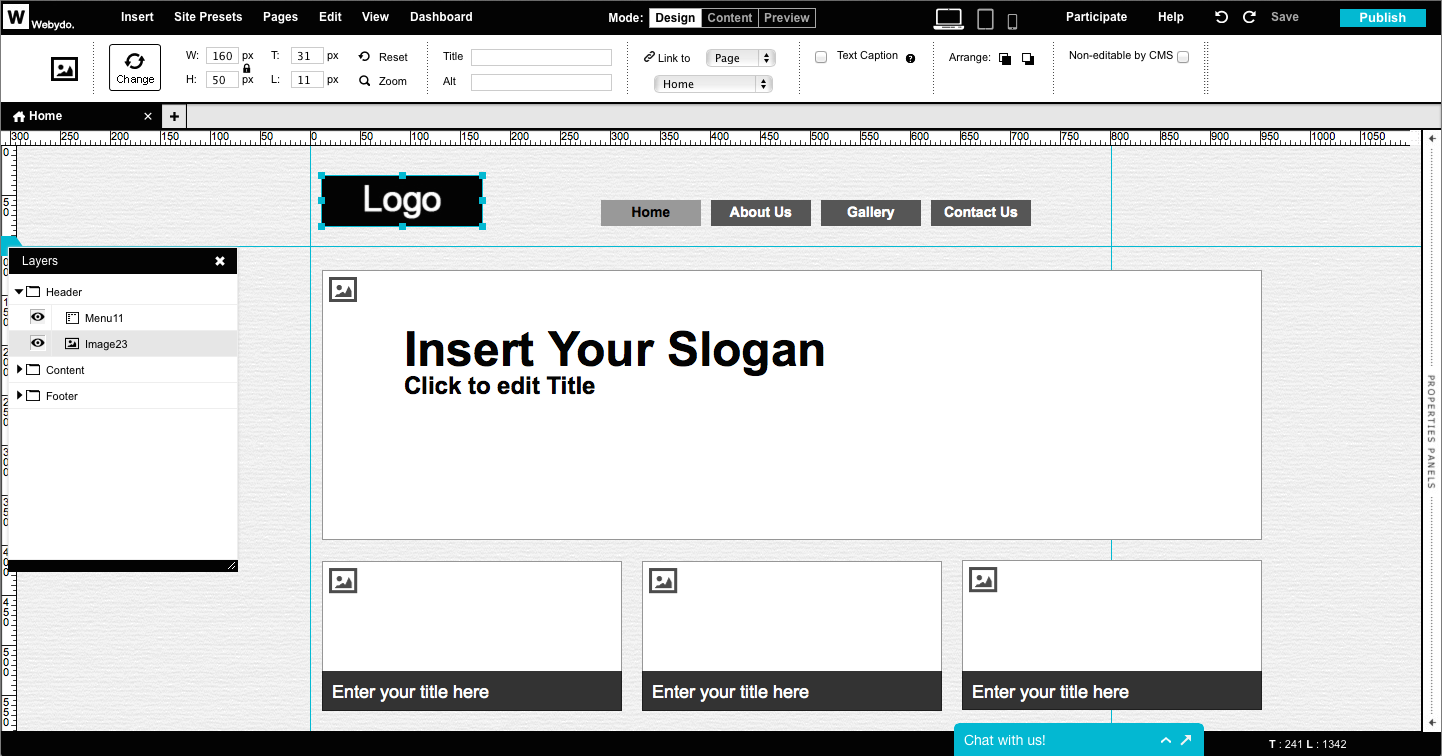
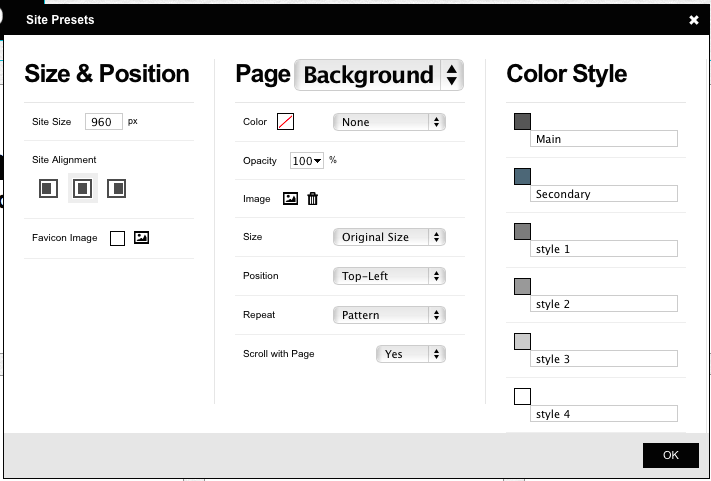
Before you jump in, the first place you should check is your basic site settings. Click the Site Presets link in the top menu, and then you can set your site width, the main theme colors you’ll use throughout your site, and pick a page background. For the background, you can easily upload a background pattern image, pick a color, tweak opacity and more. Then, with the colors, you can click each color to pick the color you want or enter its hex value. That’ll give you the base you need for a consistent design.
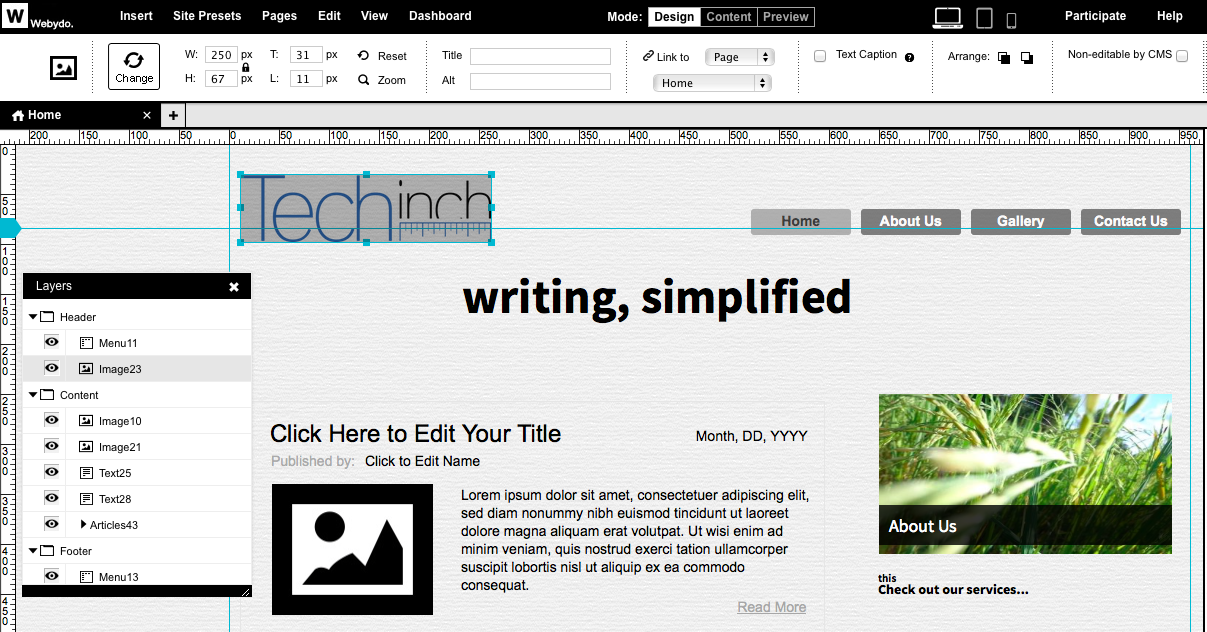
Now, it’s time to add the content you want and get it looking the way you want. You can select any element to replace it with the images and text you want, drag them around to the position you want, and resize them just like you would in Photoshop or any other graphics app. Move an element around, and you’ll see alignment guides appear to help you keep everything aligned along the grid for your site’s layout.
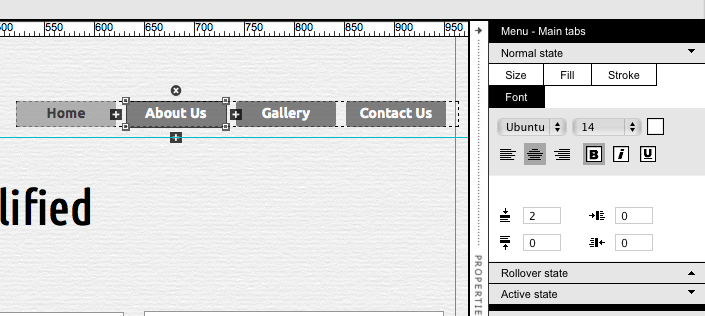
Then, it’s time to get everything looking just the way you imagined. You can select an element and tweak its font, color, alignment and more from the top menu. Or, depending on the type of element you’ve selected, you’ll see a properties panel on the right. You’ll be able to tweak the shape, color, and font in menu elements—set them once, and all menu elements will get the same design.
Or, you can drag in the gallery or blog sections instead of manually adding each element. Just like with the menu, you can tweak the design of one of the included elements once, and all of the other elements will gain the same design. Do note that everything in Webydo is based around pages, including the gallery and blog elements, so the elements in them will link to new pages with the content you’re sharing—unlike a traditional blog where blog posts are separate from your site pages.
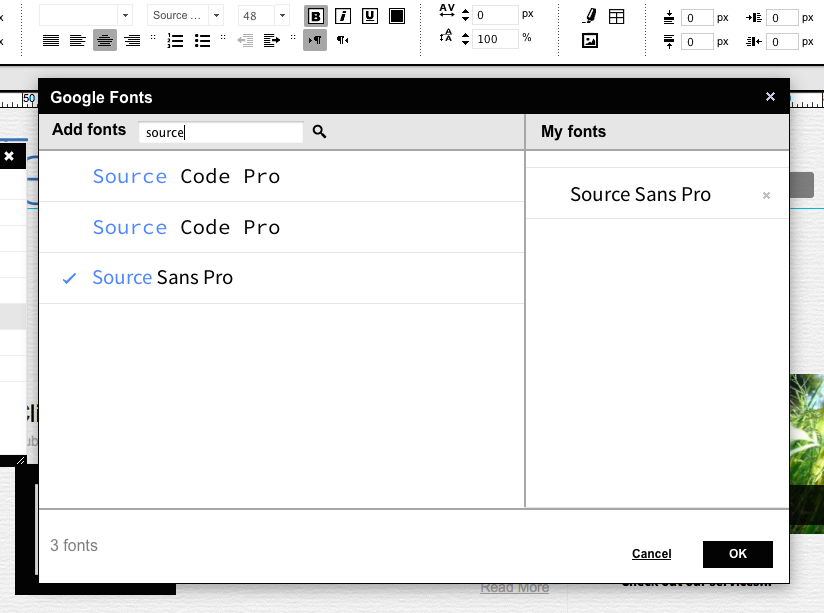
One of the nicest design elements is the built-in integration with Google Fonts. You can pick from hundreds of fonts by default, or you can search through the entire Google Font library, find the typefaces you like, and add them to your design. It’s simple, and makes it easy to get your site customized without any code.
It’ll take a bit to get your site looking just like you want, but within minutes you should start having the site you’ve always dreamed of just by dragging and dropping elements. If you really want to dig in deeper, or add more features from external services, you can use the code editor to add HTML, CSS, and more to your site, but there’s no reason to have to use code. That’s the idea behind Webydo: you can get a beautifully designed site without having to worry about code.
Doing More
There’s more than just pages, though. You can also add a store easily to your pages with ecwid, or bring along your videos and more. You can add a pre-made contact form so your site visitors can email you without leaving your site, or add a widget to embed another site or any HTML embed code from another app directly into your new site. Each of these elements can be resized and positioned as you’d like, and you’ll still find the same stroke and fill tools in Webydo to customize those elements as with everything else. And, coming soon, you’ll find even more features, including Parallax Scrolling, and you can suggest and vote for new features you’d like to see added.
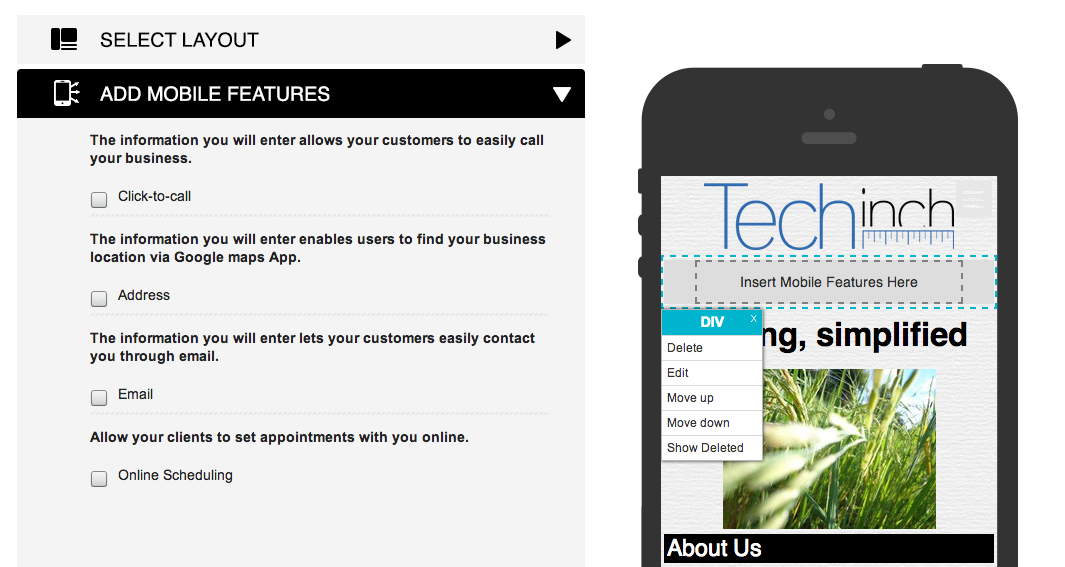
Once your site’s finished, there’s one more thing to focus on: your site’s mobile design. You can click the smartphone icon in the top right of the Webydo app, and then you’ll see your design shrunk down to a mobile size. You can then tweak the design to fit your style, with the most important elements at the top and extra touch-specific features to let your mobile visitors get the most from your site—from Google Maps integration to an option to tap-to-call your business directly.
And with that, your site’s finished. Tap the Publish button in the top right corner, and you’ll be ready to share your site with the world. You can then come back and update your site anytime, or if you want others to be able to help you edit your site, you can add them as a CMS user from your Webydo dashboard. That way, they’ll get a special login that lets them edit the text, images and more on the site, without being able to change the actual site layout and design. They’ll still be able to see the full layout in their browser as they’re editing the content, just as you do while tweaking the design.
Go Build Your Site!
With a bit of tweaking, you’ll have a beautiful new site online that looks just like you want in minutes without any coding. You can start with a nice theme, add your own stylistic touches and tweaks, and in no time you’ll have the site you want online.
Need inspiration? Check out some of the beautiful sites that have been built with Webydo, then signup for your own free trial and give it a spin. And have fun!
***
This tutorial was sponsored by Webydo. If you’d like to feature your app on Techinch with a sponsored tutorial or weekly sponsorship, (book one today)[https://techinch.com/sponsor]!
***
Thoughts? @reply me on Twitter.