How to get Google to DKIM authenticate your domain

“Email authentication was not verified.”
DKIM is one of the easiest things to overlook when setting up your domain with Google Workspace already. It’s not required—you can add Gmail to your domain with a few a records and nothing else.
But you don’t want your emails to end up in spam folders. And a DKIM record won’t guarantee anything, but it will make it far more likely your emails will show up in your recipients’ inboxes. It’s worth the few extra minutes to set up.
And yet. Odds are, if you follow Google’s directions to add a DKIM record to your domain, you’ll get the “Email authentication was not verified” error that stumped me for so long.
Here’s how to fix it.
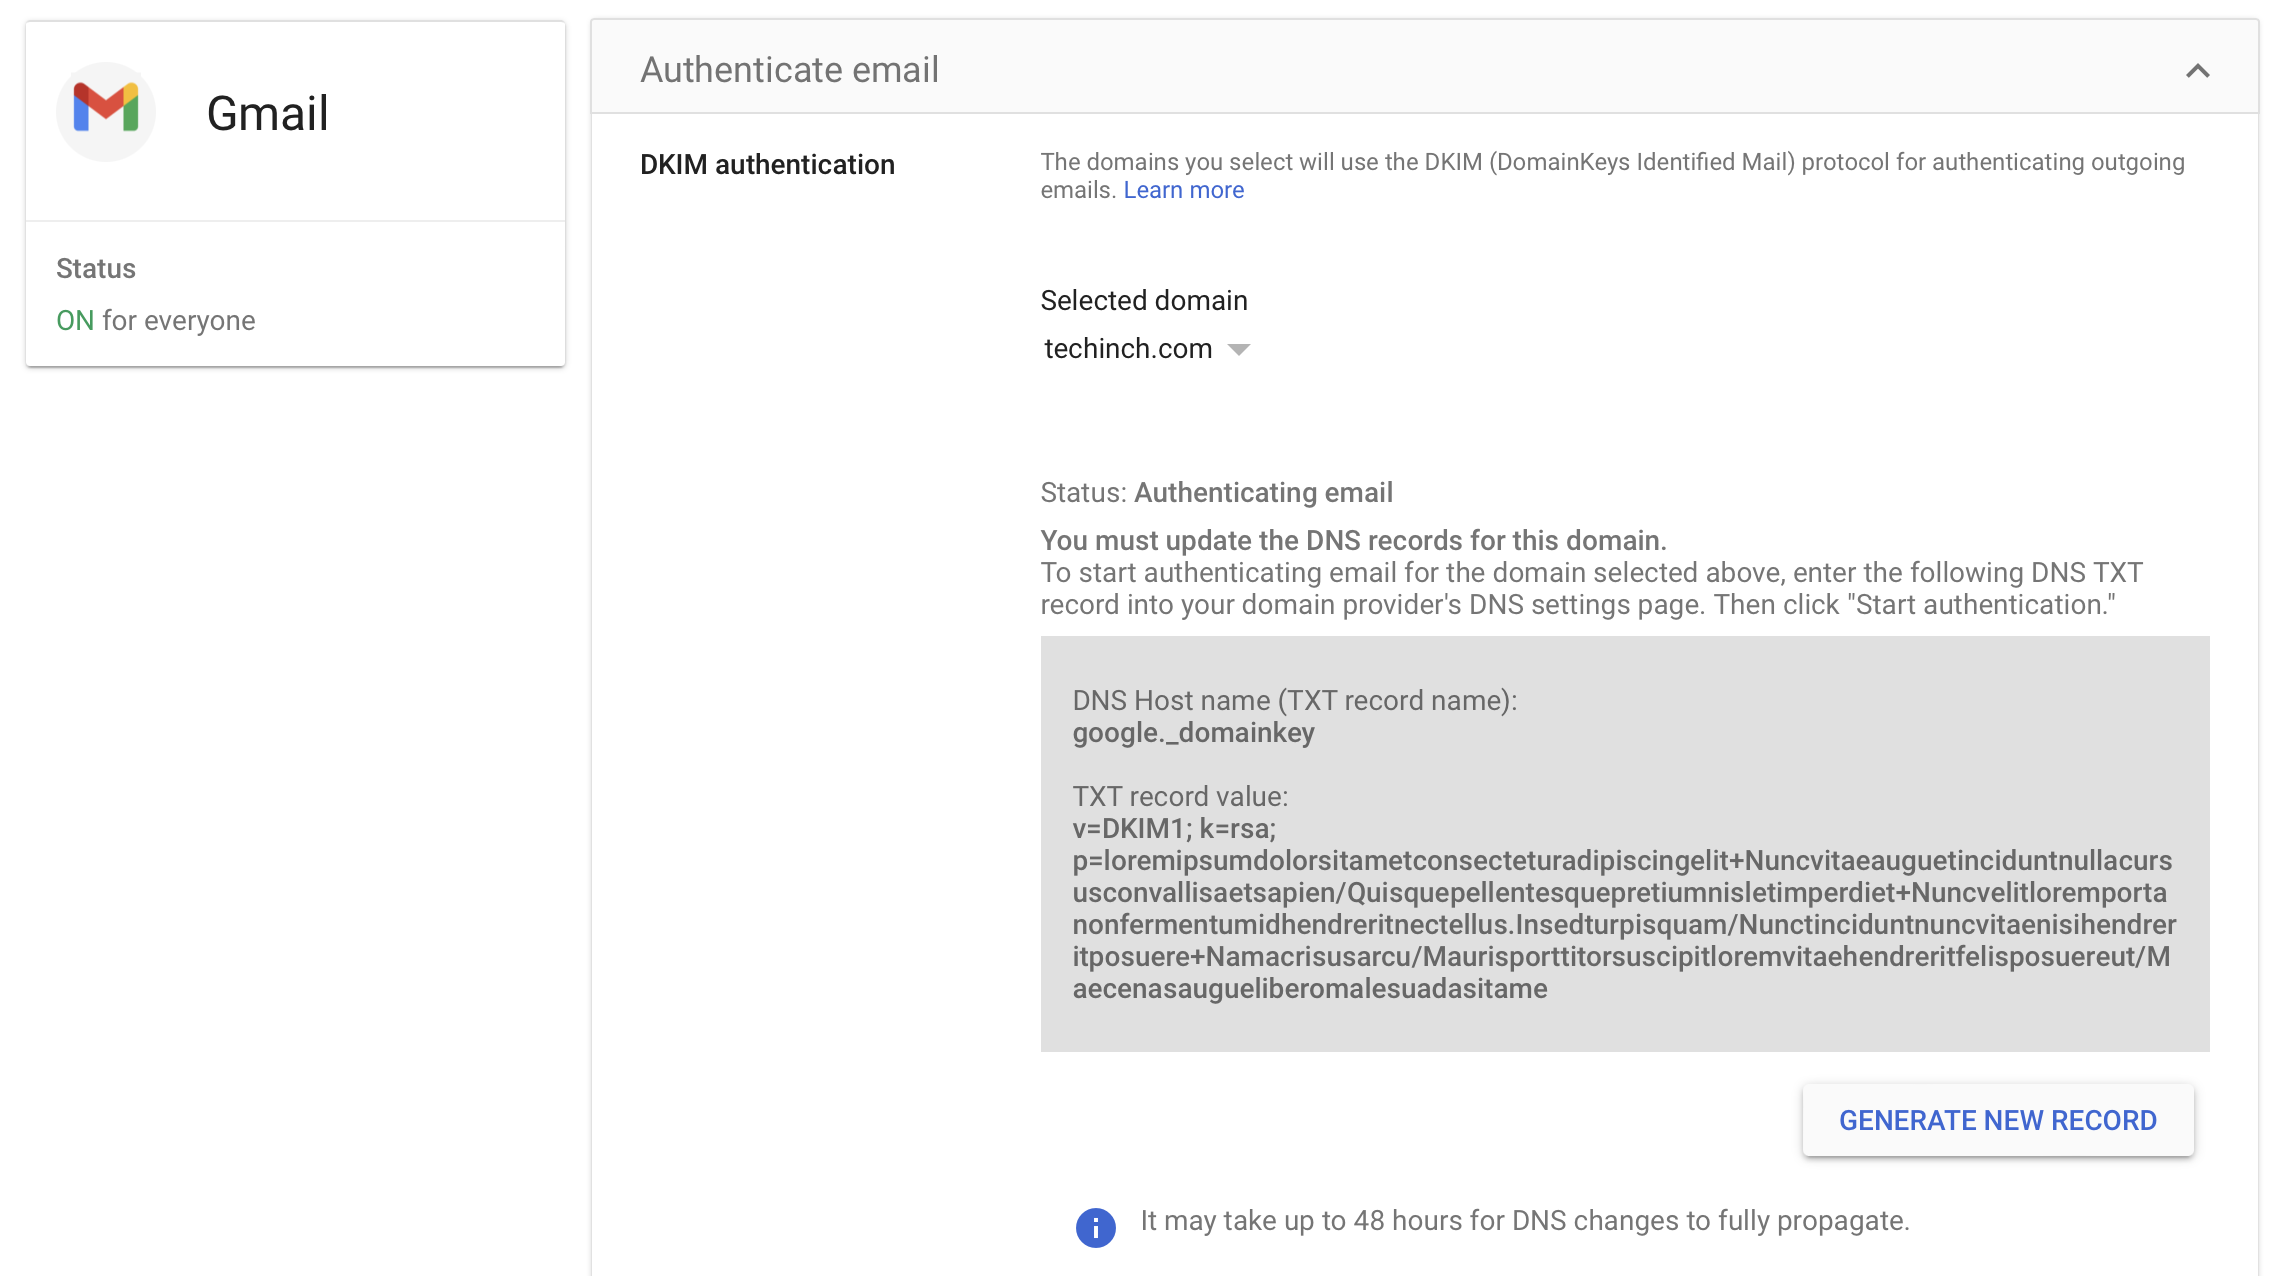
First, go to Google Workspace’s Gmail > Settings > Authenticate Email to get your DKIM key. Here’s where you’ll likely get tripped up.
If you double-click on Google’s TXT record value to copy it, your browser will show that only the DKIM record’s text is selected. If you look closely when you paste the text, though, you’ll notice that the copied text also includes the GENERATE NEW RECORD text from the button below your DKIM code.
So, before pasting your DKIM key into your domain DNS settings, it's worth pasting it into a text editor and making sure the end of the text string is your exact DKIM record, without any extraneous text tagging along at the end.
Then, open your domain registrar’s settings, add the DKIM record as a new TXT record, save your settings, and a day or so later you should be able to verify your domain.
If you still have trouble, check your DKIM Core Key Record on dkimcore, and if it doesn’t verify, try removing the last few characters from the end until you get exactly what Google’s settings page shows—and that should verify. That's how I figured out how to get my DKIM key to work in the first place.
Then, back to emailing, now with a bit more hope that your mail will land in the inbox instead of the spam folder.
Thoughts? @reply me on Twitter.
