Pixelmator Inches Closer to Being a Complete Photoshop Replacement With v3.2
It’s a big day for Mac app releases; OmniFocus 2’s been announced for release today, and then Pixelmator 3.2. Pixelmator wasn’t nearly as overdue for a new version as OmniFocus; after all, v3 was just released 7 months ago, and a point release in January brought support for the Mac Pro and other improvements. v3 brought Layer Styles and and liquify tools, while v3.1 added support for 16-bit per channel color—but that latter most-coveted feature for pro photographers was only available on the Mac Pro. Now, that gap with Photoshop (and other competitors like GIMP and Acorn) is closed, as today’s release of v3.2 brings 16-bit per channel support to all Macs.

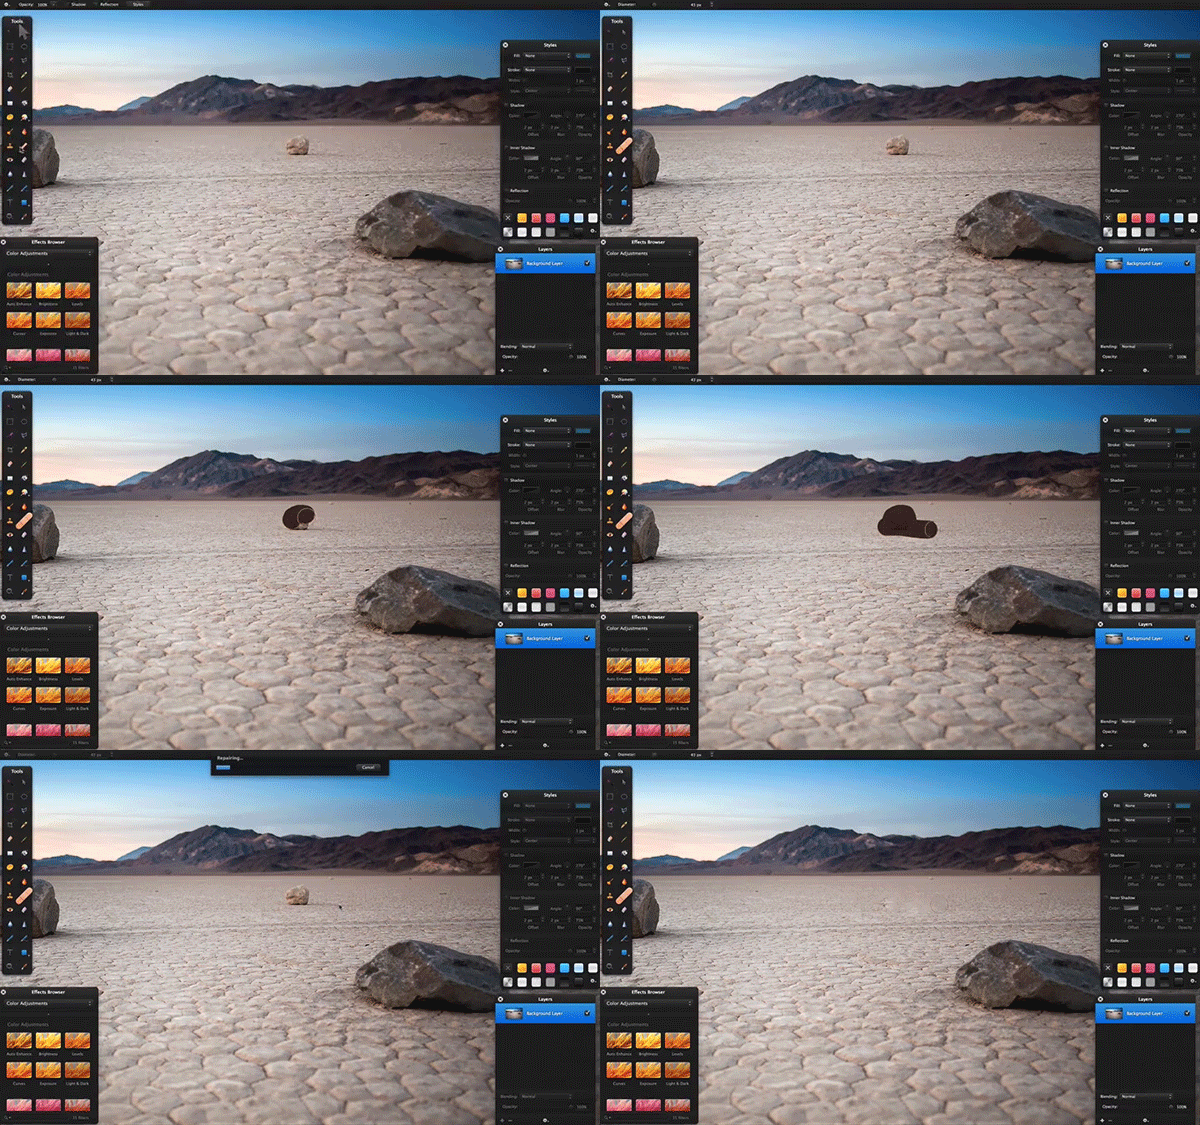
Along with that, you’ll find a much improved Repair tool in this update that is a much stronger rival to Photoshop’s Content Aware Fill. Select the Repair tool, draw over the objects you want to remove, and it’ll automagically try to replace them with the picture’s background. You can now change the size of the brush, along with its speed-vs-quality, and can get quite good results with it if you’re willing to tweak your brush and settings depending on the picture. I tried removing the parents in a screenshot of the picture used in Pixelmator’s Repair tool demo video to see if I could reproduce their results—removing the father was as simple as they showed, but removing the mother took about 4 tries before I got decent results. Either way, that’s still rather impressive.
In Photoshop, the thing I use Content Aware tools for most is for extending a pattern or section of a picture (for example, making a continuous rectangle pattern from a smaller square, or extending the sky upwards after expanding an image’s canvas). For that, I’ll select the area I want to add that pattern to, and delete it with Content Aware delete. 9 times out of 10, that works perfectly. In Pixelmator, you can use the Repair tool in much the same way, this time just drawing over the area you want to fill—but it won’t work if the area you’ve selected is transparent (the default if you’ve just extended your canvas). You’ll first need to fill that area with a color, and then select it with the Repair tool and let Pixelmator work its magic.
And then, there’s a final extra goodie: a Lock Layers option. This tiny little feature will make sure you don’t accidentally edit the layers that should already be finished, and is a handy tool that was again widely requested.
If you don’t already have a copy of Pixelmator, and aren’t already reliant on Photoshop, it’s the best $29.99 you could spend. It’s simply incredible how much of Photoshop’s functionality is packed into this tiny app these days.
Oh, and if you’re just getting started with Pixelmator, be sure to check out the new Tuts+ tutorials on Pixelmator. Pixelmator has enough of Photoshop’s features that you can follow many Photoshop tutorials in Pixelmator, but going through some Pixelmator-specific tutorials is a great way to get acquainted with its features.
Thoughts? @reply me on Twitter.
