Change Your DNS Settings on iPhone, iPod Touch, and iPad
Want to enable OpenDNS or Google DNS on your iPhone, iPad, iPod Touch, or Apple TV?
Every time you type a domain name like google.com into your browser, your device has to connect with a DNS service, find the IP address for that site, then request the page you wanted to see. That can be slow, especially with most default ISP DNS servers. You can both speed up your connection—and help make your connection more secure, especially on public free WiFi—by switching to alternative DNS services like OpenDNS or Google DNS.
Note: Unfortunately, you can’t change DNS settings on cellular internet connections in iOS.
First, enable WiFi on your device—either tap the WiFi icon in Control Center to connect to a network you've used before, or open the Settings app's Wi-Fi menu and connect to the WiFi network you want to use. Then, tap the blue i button on the right side of the network name to tweak its settings.

It used to take a few more steps, but today it's easy to set the DNS server you want. Near the bottom of the settings, tap Configure DNS—and there you'll already see if you're using the Automatic DNS service set by your WiFi, or a custom DNS service you entered yourself.
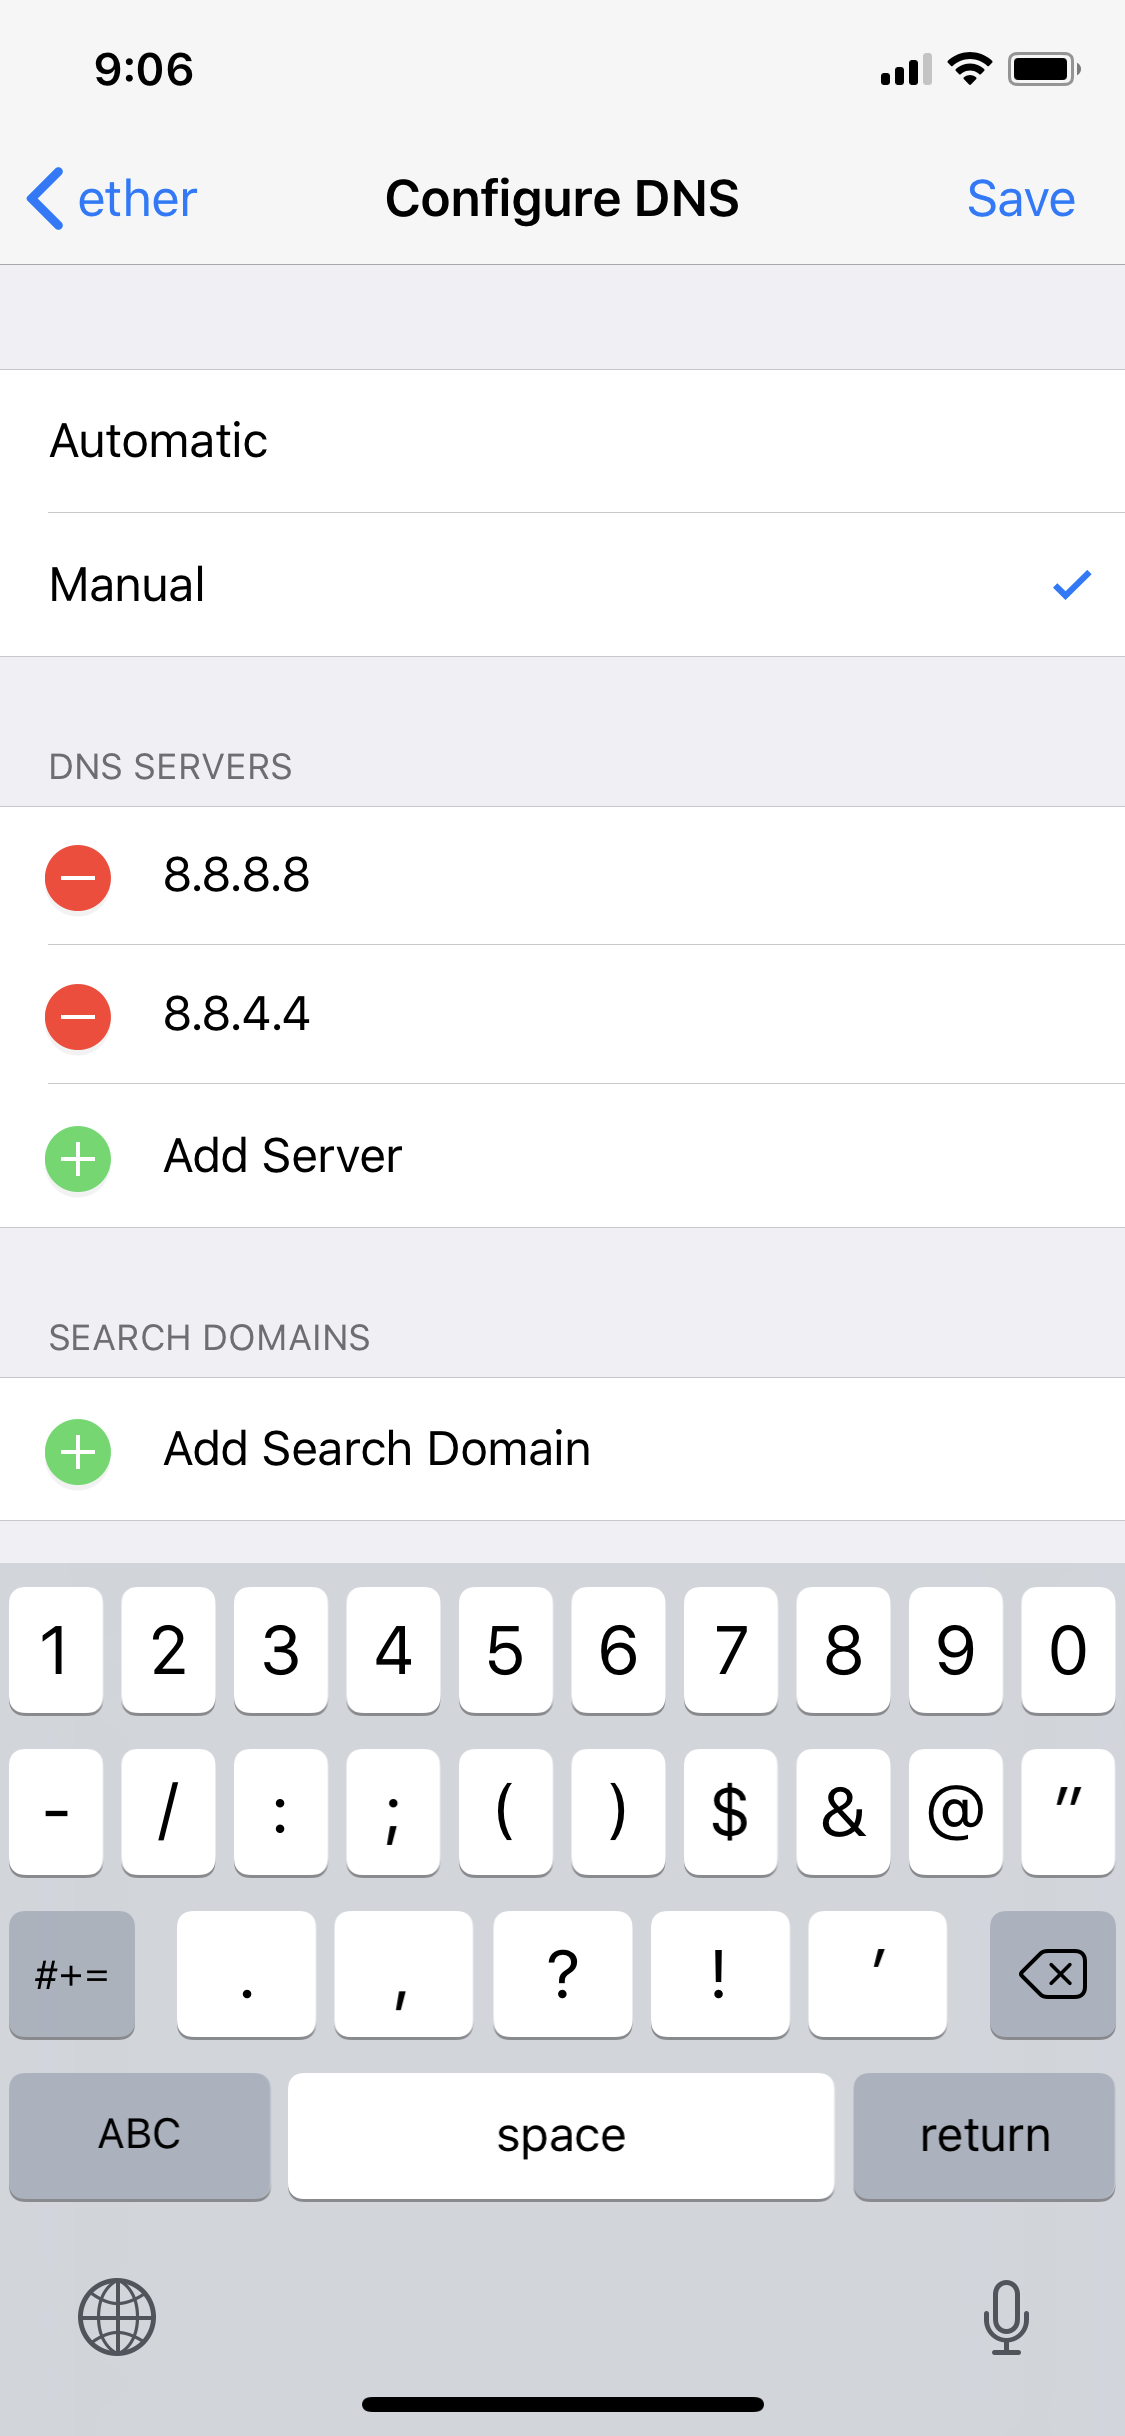
Now, tap Manual to switch DNS services, then tap the red - button to remove any existing DNS services. You can then enter the DNS you want use—all you need is the IP addresses the DNS resolution system you want to use. There are several common ones, including OpenDNS and Google DNS, along with a couple lesser known ones such as Norton DNS, Comodo Secure DNS, or even paid DNS services that can allow access to blocked sites or let you control content on your network. I’d personally recommend using OpenDNS or Google DNS if you just want fast DNS resolution.
Here’s the addresses you should use for these—add the primary IP first, then add another DNS server in your settings and enter the second IP address:
| Service: | OpenDNS | Google Public DNS | Norton ConnectSafe | Comodo Secure DNS |
| Primary IP: | 208.67.222.222 | 8.8.8.8 | 199.85.126.10 | 8.26.56.26 |
| Secondary IP: | 208.67.220.220 | 8.8.4.4 | 199.85.127.10 | 8.20.247.20 |
Once you’ve added the settings, you’ll be ready to browse the internet using your new DNS service without any extra changes. Enjoy!
Do note that you have to set your DNS settings on each network, so do note that you’ll need to change this the next time you connect to a new network. The good thing is, your device will remember your recently used networks, so you shouldn’t have to change the settings once you’ve got them set for your favorite networks. To make it easier, you could save a note in your favorite note app with the DNS settings you prefer so you can copy and past them to new networks easily.
Originally published February 4, 2011; updated for latest iOS versions.
Thoughts? @reply me on Twitter.